Virtual Private Networking (VPN)
How to install and use VPN to connect to some restricted information services that require on-campus access, such as file servers, databases, websites, and privileged applications.
Off Campus installation on both College Owned Devices and Personal Devices (students, faculty, and staff)
Have a temporary need?
Use the web based VPN for occasional access. If you connect to VPN frequently from your computer, follow the instructions below to install the full client for your system.
macOS
Download the macOS VPN client installation application
- Open your Downloads folder
- Double-click the BIGIPMacEdgeClient-7245.zip file to open it
- In the BIGIPMacEdgeClient-7245 folder that is extracted, double-click the mac_edgesvpn.pkg file to begin installation
- Click Open again if prompted
- Click Continue to start the installation
- Select Continue to choose the default installation location
- Select Install to begin the installation
- Select Close to complete the VPN Client installation
- Select Move to Trash to delete the VPN client installer app
Windows
Download the Windows VPN client installation application
- Open the downloaded file
- Select Next to begin the installation
- Select Choose Setup Type
- Select Typical to choose the default install
- Select Install
- For Do you want to allow the following program to install software on this computer?, select Yes.
- You may receive a Pop up message that "Windows protected your PC" because the app is unrecognized.
- Select the More info link to confirm that it is okay to run the installer by clicking on the "Run Anyway" button
- Select Close to complete the VPN Client installation
Using a mobile device?
Making a VPN Connection
For the best internet performance, connect to VPN only for the services you need and then disconnect when you are finished. Please reference the section below on when a VPN connection is needed.
- To start a VPN connection on a Mac - open the Geneseo VPN Client application from within your Applications folder.
- To start a VPN connection on a Windows PC - open the BIG-IP Edge Client application (use the Windows Search field or Circle in the bottom left of your task bar).Since this software requires Multi-Factor Authentication (MFA), you may be prompted to log in by Microsoft with your Geneseo username and password.
- The software should automatically connect to the VPN server (if not, click on the Connect button) and you can then access the services that require on-campus access.
- When you're done using the service, it is best to disconnect from the VPN as described below:
- macOS
- Click on the shield-shaped VPN icon in the menu bar at the top of your screen
- Select Turn VPN Off
- Click on the shield-shaped VPN icon in the menu bar at the top of your screen
- Windows
- Click on the gray and black VPN icon that looks like an ethernet port on the Windows taskbar
- Select the Disconnect button
- Click on the gray and black VPN icon that looks like an ethernet port on the Windows taskbar
- macOS
For Windows computers, to keep the VPN icon in the taskbar for easy access, when you do a search for "BIG-IP Edge Client", when it comes up in the search list, right click on it and select "Pin to taskbar".
For Macs - to keep the VPN icon in your Dock, drag the Geneseo VPN Client from your Applications folder to your Dock to create a shortcut.
More Info
What is VPN?
At SUNY Geneseo, many information services can be used anywhere, but some are restricted to on-campus access, such as file servers, databases, websites, and privileged applications. Anyone who needs to use these campus-only services can either physically travel to the campus or connect remotely through a virtual private network (VPN). A VPN provides a secure, encrypted connection from an off-campus computer or device to Geneseo's on-campus network.
When do I need to use VPN?
The following list is a sample of Geneseo services and systems that require a VPN connection from off campus:
- Appworx
- Banner Admin Pages
- EMS desktop client
- Files server - including in/out boxes and personal, departmental, and project spaces
- Library databases
- Printing to a campus networked printer
- Software licensed by the campus (ArcGIS Desktop, Mathcad, MATLAB, Minitab, Spartan, SPSS, Vectorworks)
- Xtender
Troubleshooting
macOS 13 (Ventura) ERROR
This information is only relevant for Apple computers running macOS 13 (Ventura), which was released by Apple on , and are attempting to use the Geneseo VPN Client on that OS version.
Attempting to open the Geneseo VPN Client on macOS Ventura will result in a warning message (pictured below) about the application being damaged and that it should be moved to the Trash.
The Geneseo VPN Client does not need to be moved to the Trash. The steps in this guide outline how the app can still be used on macOS Ventura despite this pop-up seemingly blocking access:
Windows Stuck "Initializing"
If the Windows Big-IP Edge Client is stuck "Initializing" there may be an issue with the "WAN Miniport (IP)" device that was created during installation. To correct this issue you can uninstall/reinstall the WAN Miniport and then reboot the computer. You can follow this guide: https://support.f5.com/csp/article/K10445740#Miniport_update
Windows - Connection Fails Successful Install
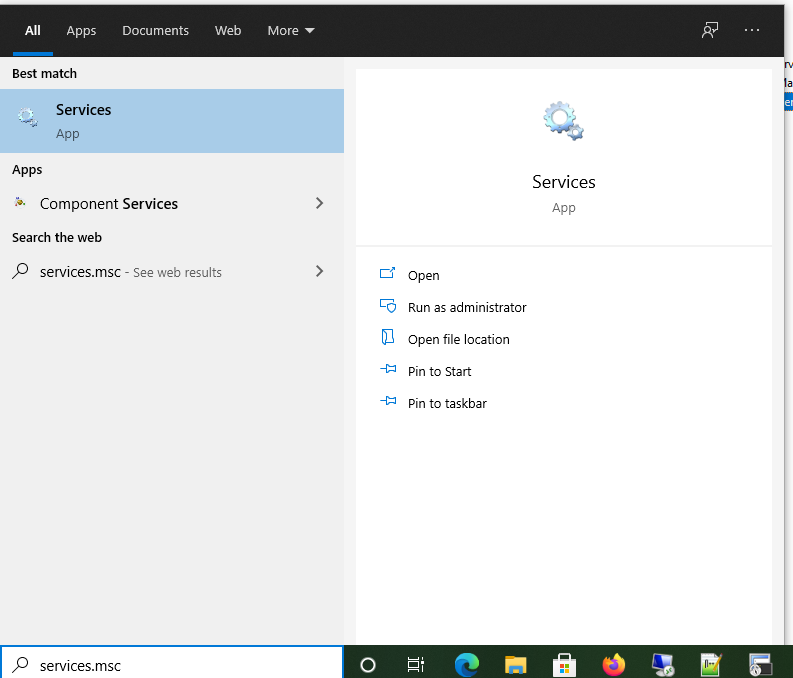
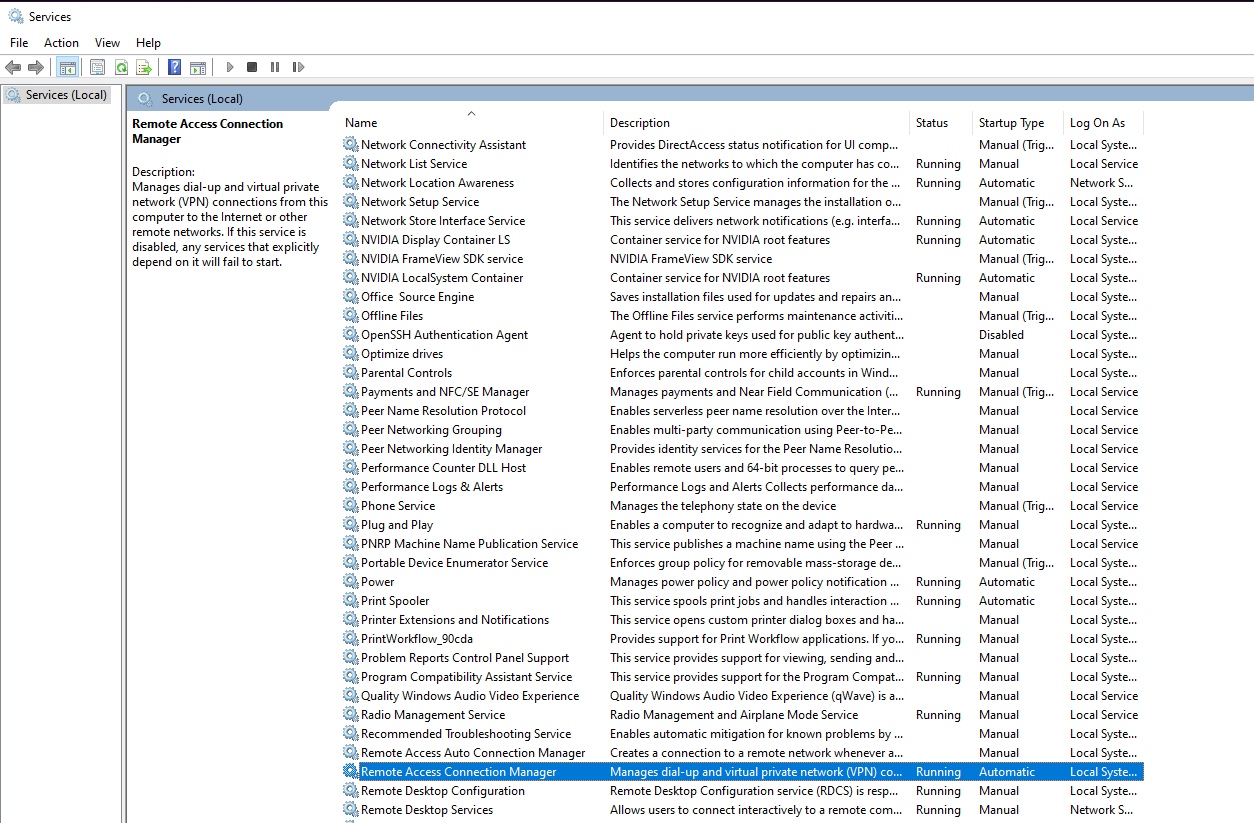
If the connection fails after a successful install, verify that the "Remote Access Connection Manager" service is started and running. To do this press the windows key to open search and then type "services.msc" without the quotes and press enter. Scroll down the list of services until you find it, start the service and retry the VPN connection.
Related articles
Still Need Help?
Ask CIT! Call (585-245-5588), email, chat, or submit a request and we'll be happy to assist you.


