...
...
| Excerpt |
|---|
This article describes how to create Advisors can create Registration Plans for their advisees. The registration plans can then be viewed by the advisee and used for registration. |
Steps
Go to MyGeneseo. Enter your Geneseo username and password if prompted and click the "Login" button.
Click the "KnightWeb" tile near the middle of the page.

Click on Faculty Services → Advisor Menu → Student Registration
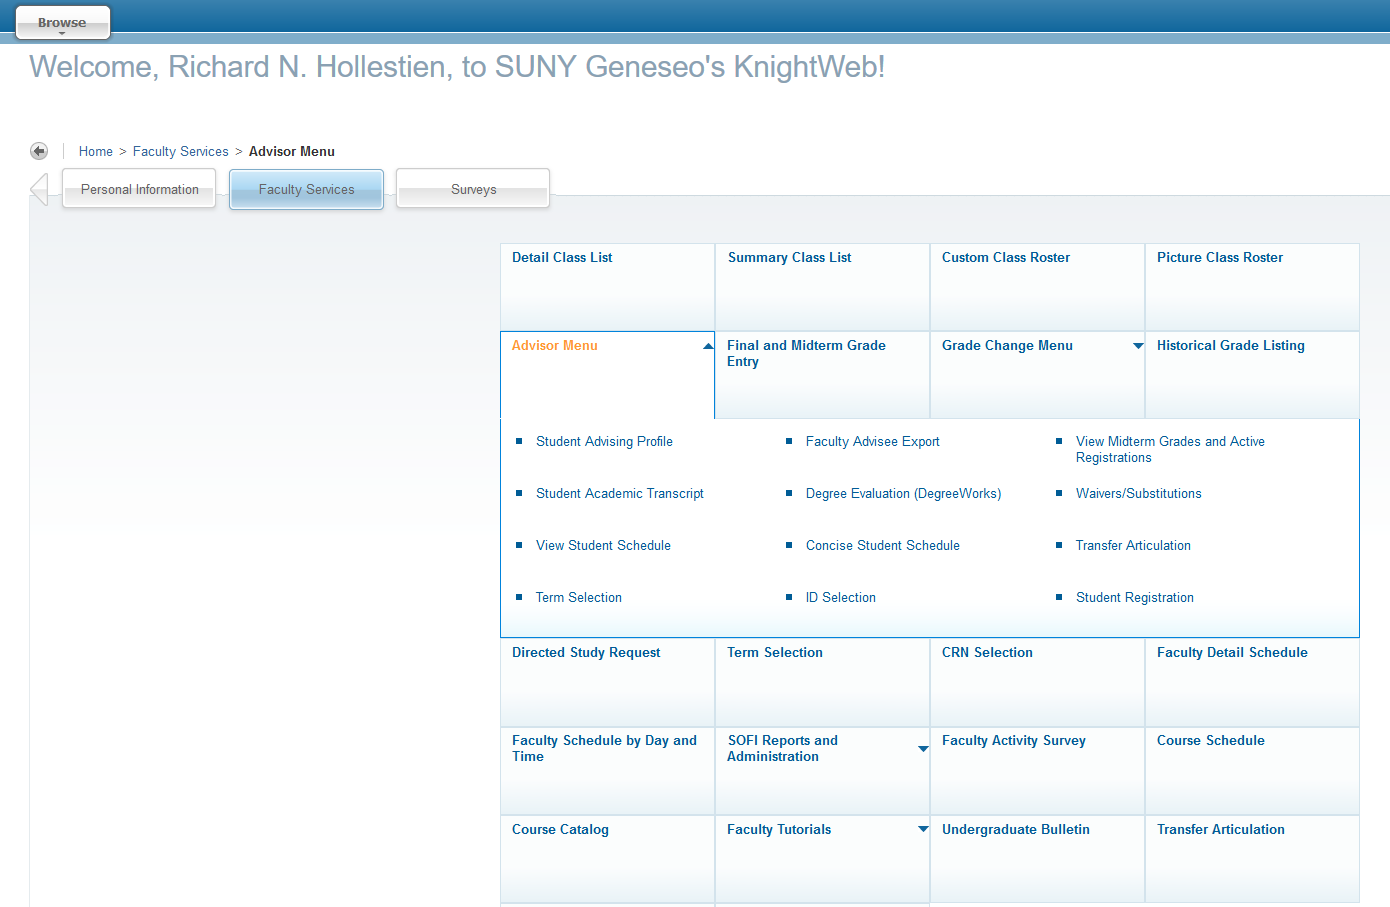
Click the "Plan Ahead" tile
...

Select the "Advisor" role and click the "Ok" button.
...

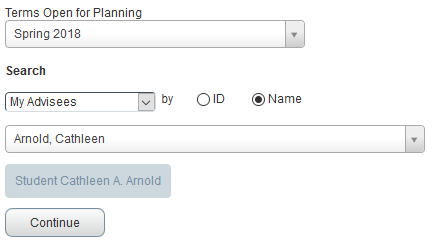
Select the upcoming registration term from the dropdown
...

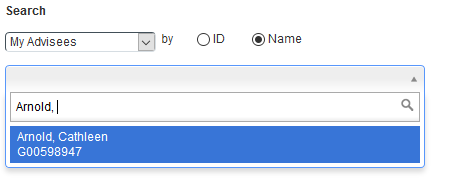
Search for the student by ID (G-Number) or Name. When the correct student appears in the dropdown, click on the record.
...
Click the "Continue" button
...
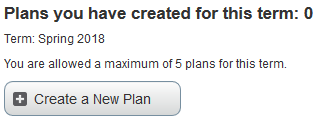
Click the "Create a New Plan" button.
...
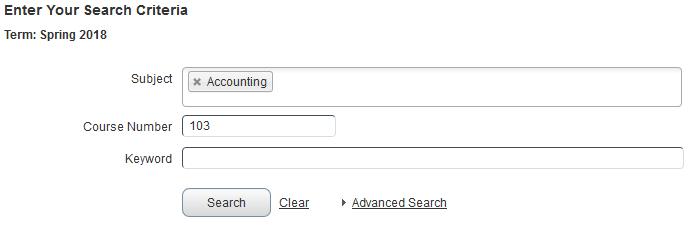
Enter a Subject and Course Number to add to the plan and click the "Search" button.
...
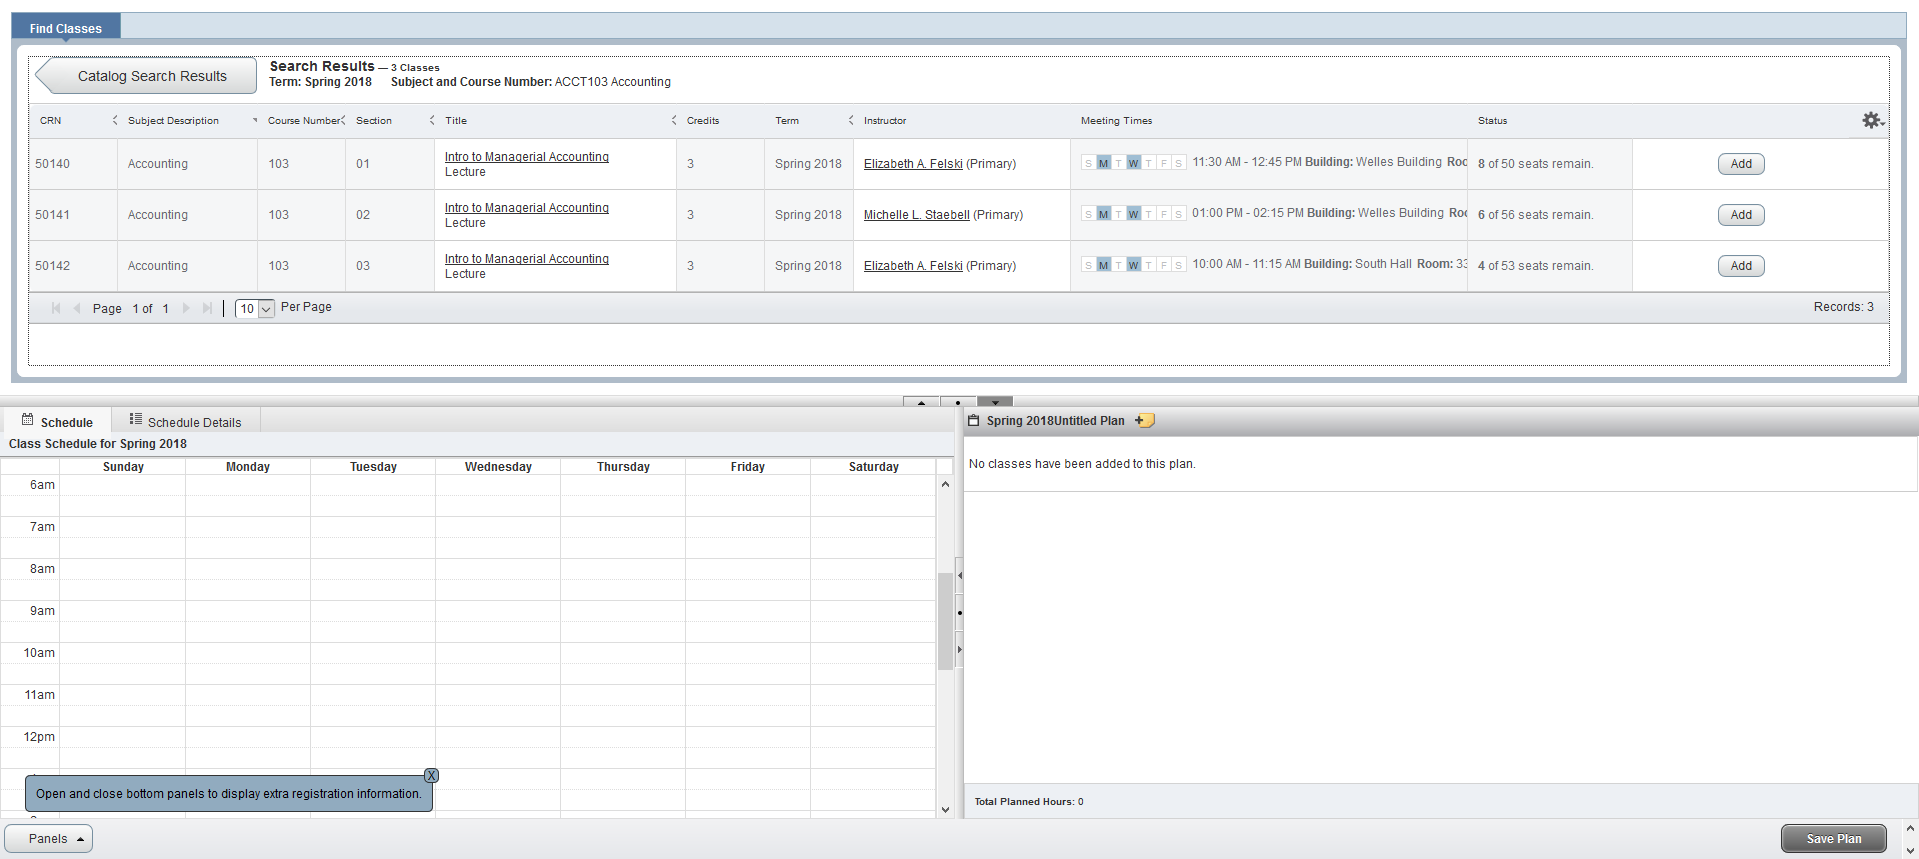
Click the "View Sections" button. Do not click the "Add Course" button - it will only add the generic catalog course (ex: ACCT 103), not a particular section of the course (ex: ACCT 103-02 w/ CRN 50141).
...

Make sure that the "Schedule Panel" is visible in the lower left section of the screen. You may need to click on the "reset panel" middle dot of the panel slider. (See red circle in the screenshot below).

Review the available sections (make sure seats are available!). Also review the Schedule Panel to ensure that no time conflicts exist. Finally, make sure that any corequisite, labs, etc., are accounted for. The Registration Plan does NOT check for any potential registration plans. You must proactively account for any potential issues when creating the plan. Once you've found an appropriate section, click the "Add" button.
If you need to add additional courses, click the "Catalog Search Results" button to return to the previous search screen. Otherwise continue to step 16.
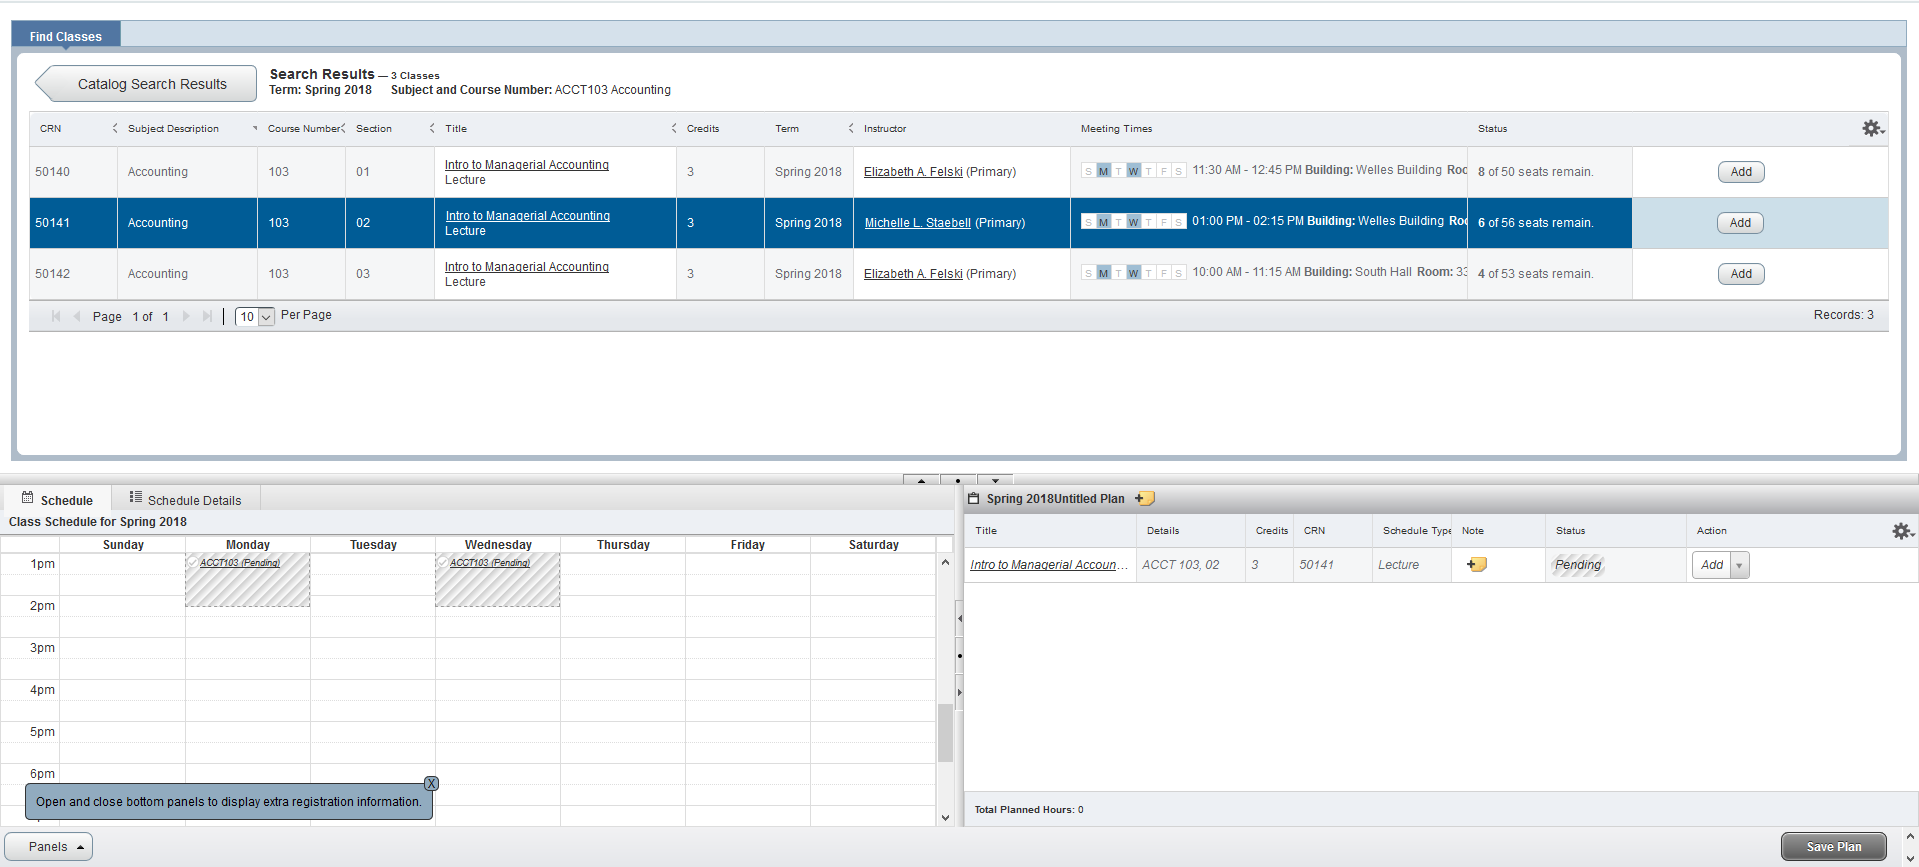
Click the "Search Again" button near the upper-right section of the screen. Remove the existing search elements. Then repeat steps 10-14 to add additional courses.
...

Once you've added all courses, click the "Save Plan" button.
...

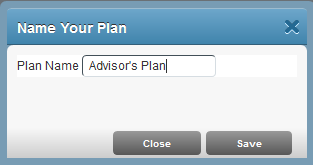
Enter a Plan Name and click the "Save" button.
...
The student will now be able to view the plan, but they won't be able to modify it. The Advisor may modify the plan by searching for the student and clicking on the list of plans of the student in step 9.
Related articles
| Filter by label (Content by label) | ||||||||||||||||||||
|---|---|---|---|---|---|---|---|---|---|---|---|---|---|---|---|---|---|---|---|---|
|
| Include Page |
|---|
...
|
...
|
| Page Properties | ||
|---|---|---|
| ||